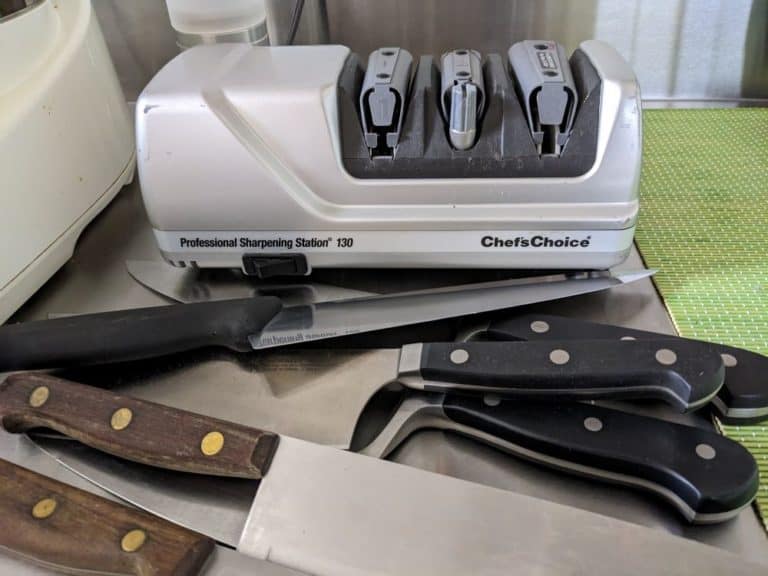
In 2015 I purchased my Chef’s Choice sharpening station. The manual was full of information, much of it baffling to a person ignorant of knives. I’d thought of the electric sharpener as a way out of learning sharpening stones, but, of course, one must learn the machine’s operation. This was clear when I’d allow family members to sharpen their knives on the Chef’s Choice. They’d hack a knife into the machine and rip it through a slot like they were trying to deflate a tire.
At the time, I owned just a cheap 8-inch Victorinox chef’s knife and a Wusthof paring knife. I was the first owner of both. I’d always cleaned and stored them carefully. I hadn’t even attempted to sharpen them or run a steeling rod along their edges before buying my Chef’s Choice. For these knives, the sharpening process was easy to figure out. When they were dull, I ran them through Stage 3 (stropping & polishing).
For years, occasionally running my knives through Stage 3 was all I did with my sharpening station. It kept my knives sharp! Sometimes I cooked less and didn’t sharpen my knives for months. Hurtling through time, year over year, minute by minute, I arrived at the present: a time of my life during which I not only cook constantly, several times per day, sometimes all day, but also developed a penchant for collecting old, horrible knives from junk shops. (I get curious about how they cut.)
The first time I found an old knife I wished to sharpen, I was confident my Chef’s Choice station could return it to factory condition. More readily I remembered the promise of the sharpening station than the tenets of its operation. It took years of experimentation and several journeys back into the Chef’s Choice manual before I was able to refurbish that very first knife (a full-tang, forged, Regent Sheffield chef’s knife, whose former owner had stored his entire knife collection loose in a cardboard box). That being said, people who know about sharpening knives will find nothing new in these tips. There is not much here but the obvious, and, in some cases, nothing but a reprint of the Chef’s Choice manual.
Note: I own a Chef’s Choice model 130. My machine is silver. If you own an older, white-colored Chef’s Choice sharpening station, these tips may or may not be applicable to your machine.
Tip No. 1: Judge Sharpness First by Looking With The Eyes (Not by Cutting a Tomato, Paper Scrap, Fingernail, etc.)
I can’t believe how many years I’d sharpen a knife, and then run it through a piece of paper without ever looking at the knife edge. Once I started sharpening old knives, my sharpness tests were giving false-positives. A knife I’d sworn was sharp would completely fail on the cutting board. Why?
Only one part of the blade hits any given object. Defects on another part of the blade completely escape the test. Plus, different types of blade imperfections manifest uniquely on different foods. A cluster of tiny scratches on the cutting edge, for example, will tear green onions apart, but provide no particular obstacle to chopping potatoes.
My basic procedure is to stand under a light source or near a window, and then tilt the blade forward and backward. A gleam of light rolls along the knife bevel. The light reveals all! Scratches, gouges, torn-up metal, unevenness and waves in the bevel—nothing can hide. A magnifying glass might be a great assistant.
Another surefire visual indication your blade has a flaw: If you wash and dry the knife with a towel (drying across and away from the edge for safety!) and the towel catches somewhere along the edge, or you see little towel fibers caught somewhere along the edge, the knife has to go back to the sharpening station (most likely to Stage 1.)
If you’re shopping for old knives at secondhand stores, be sure to do a through examination of the edge of the blade before you make your purchase. There are some things Chef’s Choice can’t fix (see Tip No. 5).
Tip No. 2: Take Your Time (Really Take Your Time) And Check The Entire Edge for a Burr in Stage 1
I don’t know the exact angle geometry to which Chef’s Choice’s Stage 1 (sharpening) is set; nor do I know the angle to which most factory knives are cut. I do know that most brand-new, factory-sharp knives like the ones I had in 2015 polished up just fine in Stage 3 without much use at all of Stage 1. Junk shop knives are the opposite. Nearly all the time spent on these knives is spent in Stage 1, reestablishing angle geometry and trying to coax a burr into being.
Here’s where the tip from the Chef’s Choice manual comes in. After pulling the knife through the left and right slots of Stage 1:
…you should confirm that a burr exists along one side of the edge. To check for the burr, move your forefinger carefully across and away from the edge…(Do not move your finger along the edge—to avoid cutting your finger.) If the last pull was in the right slot of Stage 1, the burr will appear only on the right side of the blade (as you hold it) and vice versa. The burr, when present, feels like a rough and bent extension of the edge; the opposite side feels very smooth by comparison. If a burr exists, proceed to Stage 3. If no burr exists, make one additional pull before proceeding to Stage 3. Slower pulls will help develop the burr. Confirm the presence of the burr and only then proceed to Stage 3….While you may be able to sharpen well without using this technique, it is the best and fastest way to determine that you have sharpened sufficiently in Stage 1.
Chef’s Choice Professional Sharpening Station Model 130 Manual
Once I began sharpening old knives, parts of this passage took on new meaning. First, the adjuration to move slowly through Stage 1. Earlier in the manual, Chef’s Choice suggested that each pull through the machine of an eight-inch blade should take about four seconds. For establishing a burr on knife that’s been in a Goodwill bin, kick that rule to the curb. Go slowly. Give the machine time to do its work. As many seconds per pull as possible. Stage 1 grinds down the knife until it has an angle geometry again. Fast pulls don’t do any favors. Some knives have taken me more than 20 pulls through Stage 1, too. The manual’s suggestion to make maybe one single additional pull before proceeding to Stage 3 is only applicable to a pampered, well-kept knife.
About that burr. In Stage 1, you’re not just waiting for any old burr to form anywhere on the blade. You’re waiting for a nice even burr to form along the entire length of the edge. When you check for a burr, you must check along the entire length of the edge and judge if the burr is evenly formed and distributed. If a burr formed in just one place along the blade, that proves that the rest of the blade is out of whack—not that the blade is ready for Stage 3. Keep going in Stage 1. If you journey to Stage 3 too soon, and then later return to Stage 1, you’ve wasted an enormous amount of time and effort.
Tip No. 3: Double-Check Sharpness by Running the Blade Through Stage 2 After Stage 3
This is my only unconventional tip here! For many years I never ran a single knife through Stage 2 (steeling) of my Chef’s Choice station. I never understood the “perfectly steeled edge.” Now I get it, but this tip isn’t about steeling. It’s just a quick-and-dirty way to see if there are imperfections in your blade’s edge that your naked eye missed.
If you form a perfect burr in Stage 1, then successfully sharpen your knife in Stage 3, no part of the knife will catch on the miniature carbon-steel rods located in Stage 2. Those miniature steels are designed to be used against the burr after Stage 1. In other words, a knife that has been nicely sharpened in Stage 3 will pull through Stage 2 with no resistance whatsoever. It will never make contact with anything. It will feel like nothing, because it will contact nothing.
A blade with imperfections, on the other hand, will pull through Stage 2 like it’s being dragged through gravel. (The Chef’s Choice manual says, “The steel rod is supported by elastomeric materials that allow the rod to deflect when excessive force is applied to the blade,” which I’m pretty sure means that the rods are durable and have got some bounce-back, and would be difficult to break; still, I’m definitely suggesting an improper use of the machine, so use this tip gently and at your own risk.)
When I run a finished blade through Stage 2 and I hear something catch, it always surprises me. Often the blade looks impeccable to my eye. Perhaps a magnifying glass or microscope would tell a different story. It’s back to Stage 1 for a knife that fails my Stage 2 test.
Tip No. 4: Impact Deformation and Bent Blades are Damaged Beyond Chef’s Choice Repair
Don’t buy an old knife with impact deformation in the blade. (See here for example.) The only way to remedy this damage is to completely remove it. The blade must be ground past the deformities. Could Stage 1 of the Chef’s Choice station perform this feat? Perhaps. But unless the impact damage is very small, it would take hours or days at the machine. Removal of large blade imperfections is easily performed with a heavy-duty sharpening machine, the kind you see at a flea market knife sharpening service.
The sharpening station will perform no magic on bent blades, either. With its elastomeric guide springs, it has no power to straighten something like a bent filet knife. Badly bent blade tips, like impact deformations, must be completely removed. The knife has to be cut and reshaped. Your Chef’s Choice isn’t going to do that. If you used a saw or grinder to cut off the knife tip in the garage, though, I bet the Chef’s Choice could put an edge on it again. No knife is worth that trouble.